
Fertilization
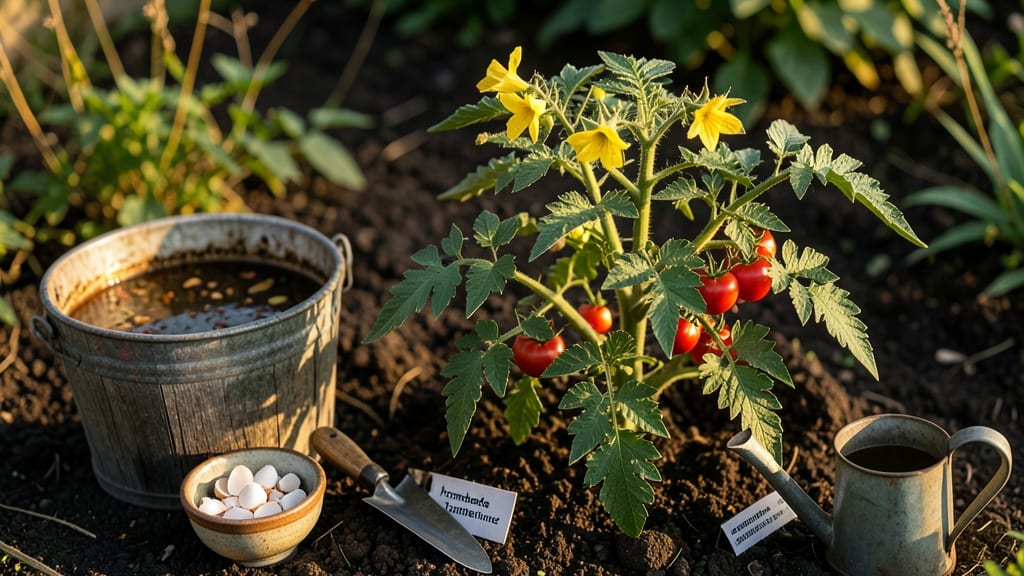
My homemade tomato fertilizer saved my struggling plants last summer—no store-bought bags needed. 🌱 The secret lies in kitchen scraps most people toss: banana peels, eggshells, and coffee grounds packed with potassium, calcium, and nitrogen that tomatoes crave.
What started as an experiment became my go-to, cutting fertilizer costs by 80% while boosting yields I’d only dreamed of.
You’ll need just five common ingredients: banana peels (for potassium), eggshells (calcium), coffee grounds (nitrogen), wood ash (trace minerals), and compost (microbes). The process takes 10 minutes to prep and 2-4 weeks to brew into a nutrient-rich tea—no fancy equipment required.
Even my black thumb can’t mess this up, and the smell? Earthy, not chemical.
By midseason, your tomatoes will show it: darker green leaves, thicker stems, and clusters of fruit that actually ripen. The brew works for containers, raised beds, or backyard plots—just dilute it and water at the base.
No more guessing what your plants need; you’re feeding them exactly what they’re starving for.
Here’s the kicker: this method outlasts commercial fertilizers by focusing on soil health, not just quick fixes. Store-bought options burn roots or leach away; my brew builds long-term vigor. Ready to turn scraps into harvests? Let’s get brewing.
📚 In This Guide
- What you need
- Instructions
- Tips and common mistakes
- Wrapping up and next steps
What you need
- ● 1 gallon of water (filtered or rainwater preferred for purity)
- ● Kitchen scraps (aim for 2–3 cups total): Eggshells (crushed or whole)
- ● Coffee grounds (used, ½–1 cup)
- ● Banana peels (chopped, 1–2 peels)
- ● Tea leaves/bags (used, 2–3 bags)
- ● Vegetable/fruit scraps (e.g., tomato stems, citrus peels, or avocado pits)
- ● 1 large container (5–10 gallon bucket or fermenting bin)
- ● Breathable cover (cheesecloth, mesh bag, or lid with holes)
- ● Blender or food processor (for breaking down scraps)
- ● Fine-mesh strainer (to filter solids before use)
- ● Wooden stick or spoon (for stirring)
- ● pH strips (to test acidity, ideal: 6.0–7.0)
- ● Glove (for handling scraps like eggshells)
Step-by-step guide to brewing nutrient-packed tomato fertilizer
Here's how I turn kitchen scraps into a potent, organic boost for your tomato plants—no store-bought chemicals needed.
🌱 Step 1: Collect and Prepare Your Base Ingredients
Start with a mix of nitrogen-rich (for leafy growth) and potassium-rich (for fruiting) scraps. I gather banana peels, coffee grounds, and eggshells—all items I'd normally toss. Rinse off any dirt or residue first, then chop banana peels and eggshells into smaller pieces for faster decomposition. Coffee grounds can go in whole or ground; they're already broken down.
This is where the magic begins: nitrogen from banana peels and coffee grounds fuels vigorous foliage, while calcium from eggshells strengthens cell walls and prevents blossom-end rot. The key is balance—too much of one can throw off your tomato's nutrient uptake. I aim for roughly equal parts by volume of each component, but adjust based on what you have available.
💧 Step 2: Create the Compost Tea or Direct Soil Mix
For a compost tea (liquid fertilizer), place your ingredients in a 5-gallon bucket, then fill it ¾ full with non-chlorinated water. I use rainwater or tap water left out for 24 hours to allow chlorine to off-gas. Add a handful of worm castings (if available) to introduce beneficial microbes that break down nutrients into plant-available forms. Cover loosely with a breathable cloth or cheesecloth to keep out pests while allowing oxygen flow.
Let the mixture steep for 3-5 days in a warm, shaded spot. You'll notice the water takes on a rich, earthy color and a slightly fermented smell—this is normal and indicates active microbial activity. Stir daily to prevent mold and ensure even decomposition. If you smell something foul after 2 days, your mixture is anaerobic (lacking oxygen), so stir more vigorously or add a handful of fresh compost to jumpstart good bacteria.
☀️ Step 3: Apply the Fertilizer at the Right Growth Stage
Use your homemade fertilizer every 2-3 weeks during the growing season, starting when plants are 6-8 inches tall. For compost tea, strain out solids and dilute with equal parts water before applying. I water at the base of the plant in the early morning to prevent fungal issues from evening moisture. Avoid wetting the leaves directly—this can cause disease, especially in humid conditions.
For a direct soil mix, work the chopped scraps into the top 2-3 inches of soil around your tomato plants. This method is best for established plants and provides slow-release nutrients. You'll see results within 2-3 weeks: darker green leaves, stronger stems, and more abundant flowers. The real test comes at harvest—tomatoes will be firmer, juicier, and less prone to cracking or disease.
✂️ Step 4: Monitor and Adjust for Optimal Results
Watch your tomato plants for signs of nutrient response. Healthy leaves should be deep green, not yellowing (which signals nitrogen deficiency) or purple-tinged (phosphorus deficiency). If you notice weak stems or small leaves, increase your nitrogen sources next brew. For blossom-end rot (calcium deficiency), crush eggshells into a fine powder and sprinkle directly around the base of affected plants.
This homemade fertilizer works best as a supplement, not a replacement, for balanced nutrition. I still add a balanced organic fertilizer (like 5-5-5) at planting time to ensure all micronutrients are covered. The scraps provide the boost, but a complete fertilizer sets the foundation. Rotate your fertilizer sources seasonally—spring brews can be heavier on nitrogen, while summer blends should emphasize potassium and phosphorus for flowering and fruiting.
Tips & tricks for perfect homemade tomato fertilizer
Transforming kitchen scraps into plant powerhouse fertilizer is easier than you think—here's how to maximize every nutrient.
Ingredient Balance is Key: The 1:1:1 ratio of banana peels, coffee grounds, and eggshells creates the perfect nutrient trifecta for tomatoes. Too much coffee grounds (high in nitrogen) can burn roots, while too many eggshells (calcium) might cause phosphorus deficiency. I always weigh my ingredients visually against each other—think "equal handfuls" rather than precise measurements. For extra potassium (critical for fruiting), add a handful of wood ash from your fireplace or grill—just sprinkle lightly around the base, never directly on leaves.
Steep Time Secrets: Those 3-5 days of steeping aren't arbitrary—they're when microbial magic happens. In warm weather (75°F+), you'll see active fermentation by day 2 with a tangy smell. If your kitchen stays cool (below 65°F), extend to 7 days. Pro tip: Place your bucket in a sunny windowsill during daylight hours to naturally warm the mixture. The rich, earthy aroma means your microbes are working overtime to break down nutrients into forms your tomato plants can absorb instantly.
Direct Soil Mix Technique: When working scraps directly into soil, focus on the top 2-3 inches where roots actively search for nutrients. I like to create small trenches around plants and bury the chopped materials—this prevents them from floating to the surface during watering. For established plants, mix in a tablespoon of crushed eggshells directly at the base to prevent blossom-end rot. The key is patience: results take 2-3 weeks, but the payoff is tomatoes with thicker skins and sweeter flavor.
Application Timing Matters: The 2-3 week application schedule aligns perfectly with tomato growth stages. Early season (when plants are 6-8 inches) benefits from nitrogen-rich brews, while mid-season (when flowers appear) needs potassium-packed versions. I mark my calendar with "fertilizer day" every 2 weeks during the growing season—consistency beats intensity every time. Always apply in early morning to let foliage dry before evening humidity sets in, reducing fungal risks.
Pro Tips for Tomato Fertilizer Homemade
- Transforming kitchen scraps into plant powerhouse fertilizer is easier than you think—here's how to maximize every nu...
- Ingredient Balance is Key: The 1:1:1 ratio of banana peels, coffee grounds, and eggshells creates the perfect nutrien...
- Steep Time Secrets: Those 3-5 days of steeping aren't arbitrary—they're when microbial magic happens. In warm weather...
Frequently asked questions
Got questions about whipping up your own tomato fertilizer? You’re not alone—homemade garden brews can feel a little mysterious at first! Here’s a quick rundown of the most common queries to get you growing with confidence.
How often should I apply homemade tomato fertilizer?
For liquid fertilizers like compost tea or banana peel brew, apply every 2–4 weeks during the growing season (spring to early fall). Solid fertilizers (like egg shells or coffee grounds) can be worked into the soil once a month or before planting. Overdoing it can burn roots—so dilute liquid fertilizers and go easy on nitrogen-heavy scraps!
How long does it take for homemade fertilizer to work?
Results vary! Liquid fertilizers (like coffee or banana brews) may show benefits in 1–2 weeks as plants perk up. Solid amendments (egg shells, crushed bones) take 4–6 weeks to break down and release nutrients. Patience pays off—consistency is key for lush, productive tomatoes!
Can I use any kitchen scraps, or are some toxic to tomatoes?
Stick to plant-safe scraps like coffee grounds, banana peels, eggshells, and vegetable peels. Avoid meat, dairy, or oily foods—they attract pests and rot. Citrus peels (in moderation) are fine, but too much can acidify soil. When in doubt, compost first or use a small batch to test!
What’s the best temperature for brewing homemade tomato fertilizer?
Most brews thrive at room temperature (60–80°F). Warmth speeds up decomposition, but don’t boil—heat can kill beneficial microbes. For compost tea, let it sit in sunlight for 24–48 hours. Cold brews (like eggshell tea) can steep for 1–2 weeks in a cool, dark spot.
My tomatoes look healthy, but I’m not seeing bigger fruit. Did my fertilizer fail?
Don’t panic! Tomatoes need more than just fertilizer—ensure they get 6+ hours of sun, 1–2 inches of water weekly, and support for vines. If fruit is small, try a balanced brew (like a mix of banana peels for potassium and coffee grounds for nitrogen). Prune suckers and pollinate by hand if needed!
Still stumped? Drop your specific scraps or symptoms in the comments—we’re happy to troubleshoot!
Wrapping up and next steps
Making your own tomato fertilizer from kitchen scraps isn’t just budget-friendly—it’s a game-changer for your garden! 🌱 With simple ingredients like coffee grounds, eggshells, and banana peels, you’re giving your plants a nutrient boost without the hassle (or cost) of store-bought fertilizers. Plus, you’re reducing waste—what’s better than that?
Ready to level up your gardening game? Start small with one of these homemade brews, monitor your tomato plants’ growth, and soon you’ll be reaping the rewards of juicier, healthier tomatoes. Happy gardening!