
Companion Plants
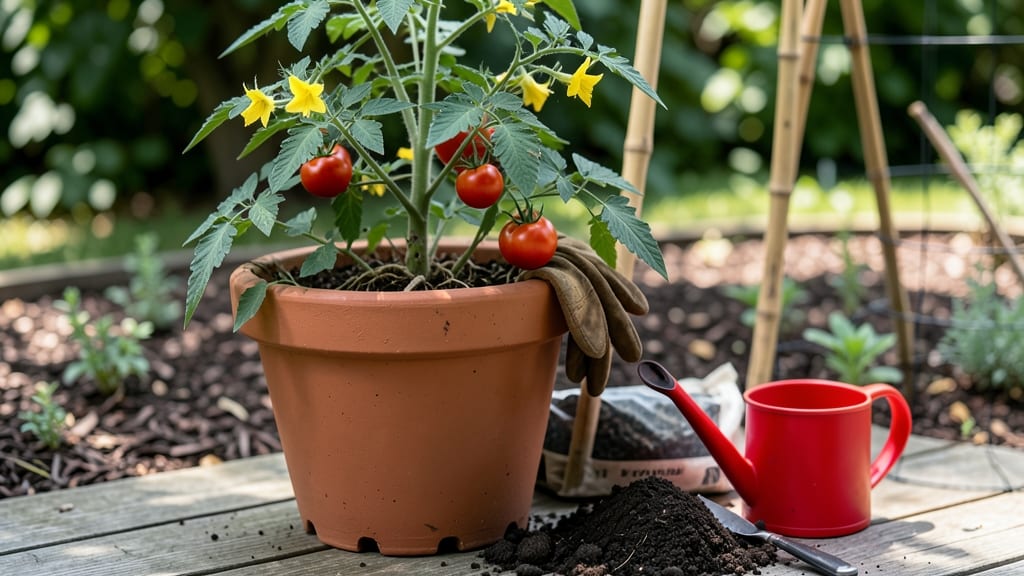
Repotting tomato plants at the right time can double your harvest. 🌱 I’ve watched my compact cherry tomatoes explode into foot-long vines after just one repotting session—here’s how to get the same results without stressing the plant.
The key is timing: move seedlings into 5-gallon containers when they hit 6–8 inches tall, or transplant mature plants if roots circle the pot. Use a well-draining mix with aged compost—store-bought potting soil lacks the nutrients tomatoes crave. A 10% perlite addition prevents soggy roots that invite disease.
After repotting, keep plants in partial shade for 3–5 days to reduce shock, then water deeply at the soil line (never the leaves). You’ll see new roots breaking through the container sides within 2 weeks, and fruit production ramps up by 4–6 weeks.
The difference between a struggling plant and a prolific one often comes down to this single step.
Works for both determinate (bush) and indeterminate (vining) varieties, and adapts to patio pots or raised beds. Here’s how to avoid the most common mistakes—like overwatering or choosing the wrong container size—that keep gardeners from seeing these results.
📚 In This Guide
- What you need
- Instructions
- Tips and common mistakes
- Wrapping up and next steps
What you need
- ● New pots or containers: 1-2 inches larger in diameter than the current pot (e.g., 5-gallon pots for mature plants). Ensure they have drainage holes.
- ● High-quality potting mix: 1 bag (1-2 cubic feet). Look for a well-draining, organic blend (e.g., 60% potting soil, 30% compost, 10% perlite).
- ● Tomato plants: 1-10 plants (depending on your garden!). Choose healthy, non-flowering seedlings or mature plants needing a size upgrade.
- ● Pruning shears or sharp scissors: 1 pair (sterilized with rubbing alcohol).
- ● Watering can or hose with a gentle nozzle: 1 (for post-repotting hydration).
- ● Slow-release fertilizer: 1 packet (e.g., 10-10-10 or tomato-specific blend). Mix 1 tbsp per gallon of soil.
- ● Copper tape or fungicide: 1 roll/spray (to prevent soil-borne diseases like blight).
- ● Support stakes or cages: 1 per plant (if your new pot lacks built-in support).
- ● Mulch (straw or shredded leaves): 1 bag (to retain moisture and regulate temperature).
- ● Gloves and knee pads: 1 pair each (for comfort during the process!).
Step-by-step guide to repotting tomato plants
Here's how I transform root-bound tomatoes into vigorous producers—no stress, just stronger growth.
🌱 Step 1: Choose the Right Container and Timing
Select a pot that's 2-4 inches larger in diameter than the current container—too big delays fruiting. I use fabric grow bags for tomatoes because they prevent root circling and improve aeration. The pot must have drainage holes; if not, drill them yourself. Timing matters too: repot when you see roots growing through drainage holes or when the plant looks stunted despite regular watering.
Water the tomato plant thoroughly 12 hours before repotting. This ensures roots slide out easily without tearing. I like to work in the morning so the plant has the entire day to recover. Choose a cloudy day if possible—direct sun stresses plants during this transition.
🪴 Step 2: Prepare Soil and Transplant Carefully
Fill the new container halfway with a mix of 60% premium potting soil and 40% compost. This blend provides nutrients while maintaining excellent drainage. Gently remove the tomato from its old pot by squeezing the sides or turning it upside down. Tap the root ball lightly to encourage roots to spread naturally.
Place the plant in the center of the new pot and fill around the roots with your soil mix, pressing lightly to eliminate air pockets. Leave 1 inch of space between the soil surface and the pot rim for watering. Don't bury the stem deeper than it was before—this encourages rot. Water deeply after repotting to help soil settle around the roots.
☀️ Step 3: Provide Recovery Care and Monitor Growth
Keep the repotted tomato in partial shade for 3-5 days to reduce stress. I place mine under a sheer curtain that filters 50% of sunlight. During this time, water only when the top inch of soil feels dry—overwatering now can suffocate new root growth. After the initial recovery period, gradually reintroduce full sun over 3-4 days.
Watch for new growth as your signal that roots are establishing. You'll see it in 7-10 days as fresh leaves emerge and the plant begins to look perkier. Fertilize lightly with a balanced 10-10-10 formula 2 weeks after repotting to support the new root system. Avoid heavy feeding immediately—roots need time to adapt to their new home.
Tips & tricks for repotting tomato plants
Here's what nobody tells you about giving your tomatoes the fresh start they deserve.
Container Selection: Fabric grow bags are my go-to because they mimic natural root behavior, but if you prefer traditional pots, choose ones with vertical ridges to prevent root circling. The 2-4 inch size increase is critical—any larger and you'll delay fruiting while roots search for nutrients. I've seen gardeners use old rain gutters cut into sections for a unique solution that still provides excellent drainage.
Root Handling: When removing the plant, gently squeeze the sides of the old pot rather than pulling—this preserves fragile roots. If roots are heavily entwined, use a butter knife to loosen them without cutting. The 12-hour pre-watering is non-negotiable; dry roots tear easily. I've learned this the hard way after watching roots snap during repotting sessions.
Soil Mix Strategy: That 60/40 soil-to-compost ratio works wonders, but here's the secret: mix in 1 cup of perlite per 5 gallons of soil to improve aeration. Press the soil firmly around roots to eliminate air pockets, but don't compact it like you're building a wall—roots need room to breathe. I always tap the pot gently on my workbench to help soil settle naturally.
Recovery Period: The 3-5 day partial shade requirement is your plant's chance to recover without stress. I use a simple white bedsheet draped over a frame for shade—it's free and filters light perfectly. During this time, resist the urge to check constantly; overwatering is the #1 mistake that suffocates new root growth. After those 3-4 days of gradual sun reintroduction, you'll notice fresh leaves appearing within 7-10 days.
Pro Tips for Repotting Tomato Plants
- Here's what nobody tells you about giving your tomatoes the fresh start they deserve.
- Container Selection: Fabric grow bags are my go-to because they mimic natural root behavior, but if you prefer tradit...
- Root Handling: When removing the plant, gently squeeze the sides of the old pot rather than pulling—this preserves fr...
Frequently asked questions
Got questions about repotting your tomato plants? You’re not alone! Here are some of the most common concerns—plus straightforward answers to help you grow like a pro.
When is the best time to repot tomato plants?
Repot your tomato plants early in the growing season—typically in spring, before the last frost—when they’ve outgrown their current container or show signs of root binding (roots circling the bottom). Avoid repotting during extreme heat or cold, as stress can delay growth. Seedlings can be repotted once they’ve developed their second set of true leaves.
How often should I repot tomato plants?
Tomatoes are heavy feeders and grow fast, so they may need repotting every 2–4 weeks if they’re in small containers (under 5 gallons). For larger pots (10+ gallons), repotting once a season—when roots fill 25% of the pot—is usually enough. Watch for: roots sprouting from drainage holes, stunted growth, or yellowing leaves.
Can I repot tomatoes directly into the ground instead of a pot?
If you’re using container-grown tomatoes for in-ground planting, harden them off first (acclimate to outdoor conditions for 7–10 days). Dig a hole twice as wide as the root ball, loosen roots gently, and place the plant at the same depth it was in the pot. Mulch heavily to retain moisture and reduce transplant shock.
What if my tomato plant looks stressed after repotting?
Don’t panic! Stress is normal—just pause fertilizing for 1–2 weeks to let roots recover. Keep the soil consistently moist (not soggy) and place the plant in partial shade for a few days. If leaves wilt or turn yellow, it’s likely transplant shock. Prune any damaged foliage and monitor closely.
Can I reuse the same pot for repotting?
Yes, but sterilize it first! Scrub with soapy water, rinse well, and sanitize with a 10% bleach solution (1 part bleach to 9 parts water) to kill pests/diseases. Let it dry completely before repotting. Pro tip: Add fresh potting mix to refresh nutrients—old soil can deplete over time.
Wrapping up and next steps
Repotting your tomato plants is a simple yet powerful way to boost their growth and reward you with a bountiful harvest! By choosing the right container, soil, and timing, you’ll give your plants the space and nutrients they need to thrive.
Remember, healthy roots mean happier plants—and that means more delicious tomatoes on your table.
Ready to take the next step? Start by monitoring your plants’ progress after repotting. Keep an eye on their growth, adjust care as needed, and enjoy the satisfaction of watching your garden flourish! 🌱🍅