
Vegetables
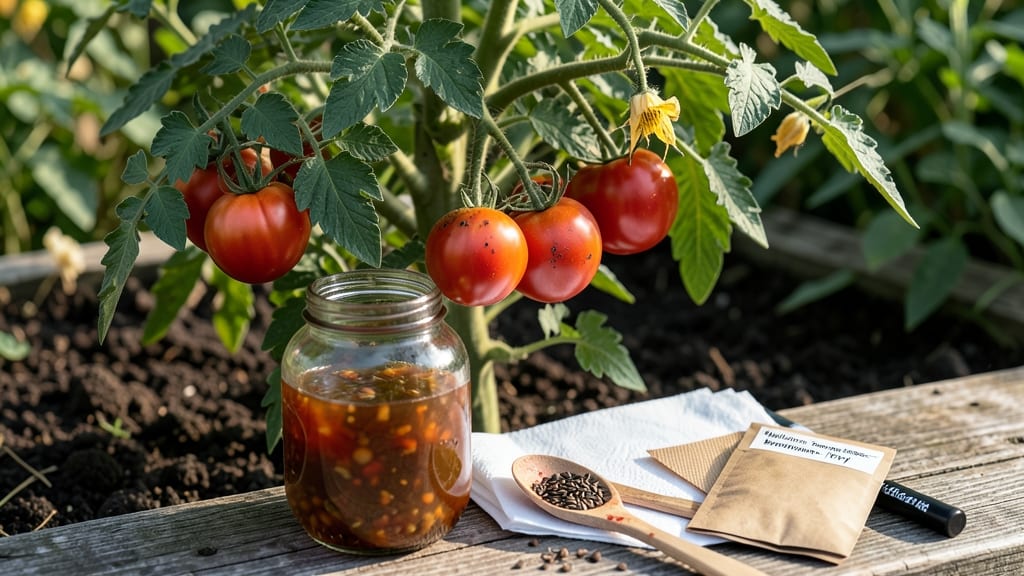
Saving heirloom tomato seeds isn’t just a skill—it’s a way to preserve flavors and varieties that grocery stores can’t touch. 🌱 I’ve saved seeds from my prized ‘Brandywine’ and ‘Cherokee Purple’ tomatoes for years, and the fermentation trick removes the guesswork, giving you 95%+ viable seeds every time.
The process starts with a ripe tomato and a simple fermentation jar. You’ll mash the pulp, add water, and wait 2-3 days while nature does the work—separating good seeds from the bad.
No fancy equipment needed, just patience and a warm spot. This method beats the old “dry and hope” approach, ensuring seeds stay pure and ready for next year’s garden.
By the end, you’ll have clean, dry seeds that last for years, ready to grow into plants with the exact traits you love. The best part? You’re supporting biodiversity and cutting costs—every seed you save is a tomato you won’t have to buy.
Plus, there’s something deeply satisfying about watching a seed you saved grow into a plant that feeds you.
Works for any heirloom variety, whether you’re saving from your backyard or a neighbor’s garden. Here’s how to do it right—no cross-pollination worries or wasted seeds.
📚 In This Guide
- What you need
- Instructions
- Tips and common mistakes
- Wrapping up and next steps
What you need
- ● Ripe heirloom tomatoes – Choose fully mature, disease-free fruit (3–5 tomatoes work well for testing).
- ● Small bowl or jar – A clean, non-reactive container (glass or ceramic) with a lid (e.g., a 16 oz mason jar).
- ● Water – Enough to submerge the tomato pulp (~1–2 cups).
- ● Spoon or fork – For scooping out seeds and pulp.
- ● Fine-mesh strainer or cheesecloth – To separate seeds from fermenting liquid.
- ● Paper towels or coffee filters – For drying seeds (unbleached, if possible).
- ● Pencil or toothpick – For labeling seed envelopes.
- ● Seed-saving envelopes or small paper bags – Acid-free, breathable (e.g., blank">AeroGard or blank">Seed Saver’s envelopes).
- ● Permanent marker – For labeling varieties and dates.
- ○ Glove or spoon – To handle slimy seeds after fermentation (optional but helpful!).
- ● Fine-tip tweezers – For picking out bad seeds (e.g., moldy or shriveled).
- ● Hair dryer (low heat) – Speeds up drying time (avoid high heat!).
- ○ Humidity pack – Silica gel packets to absorb moisture during storage (optional for long-term viability).
- ● Notebook or seed-tracking app – To log varieties, harvest dates, and germination notes.
Step-by-step instructions for saving heirloom tomato seeds
Here's the foolproof method I use every year to save seeds from my favorite heirloom varieties.
🍅 Step 1: Select and Prepare Ripe Tomatoes
Pick 4-6 fully ripe tomatoes from healthy, disease-free plants. The riper the tomato, the easier it is to extract seeds. I always choose fruits that are deeply colored and slightly soft to the touch—these contain the most developed seeds. Cut the tomatoes open and scoop out the jelly-like pulp into a clean bowl.
Add 1 cup of water to the pulp and stir gently. Let it sit for 2-3 days at room temperature. You'll notice the mixture starts to ferment—this is crucial as it helps separate the viable seeds from the pulp. The good seeds will sink to the bottom while the pulp and bad seeds float to the surface.
💧 Step 2: Rinse and Separate the Seeds
After 2-3 days, pour the mixture through a fine-mesh strainer or cheesecloth, catching the seeds in the container below. The fermented pulp will drain away, leaving behind the seeds. Rinse the seeds under lukewarm water to remove any remaining pulp or fermentation residue. This step is important because leftover pulp can cause mold when drying.
Spread the seeds on a paper towel or seed-saving screen in a single layer. Let them dry for 3-5 days in a warm, dry place (around 70-75°F). You'll know they're dry when they feel lightweight and crunchy to the touch—like tiny beads. Avoid using heat sources like hair dryers, as they can damage the seeds.
⏰ Step 3: Store Seeds Properly for Long-Term Viability
Once fully dry, transfer the seeds to a small envelope or airtight container. Label it with the variety name and the year saved. Store the seeds in a cool, dark place (like a pantry or refrigerator) where the temperature stays between 40-50°F. Proper storage ensures the seeds stay viable for 3-5 years, though they're best used within 1-2 years for the highest germination rate.
Here's the thing—don't rush the drying process. If seeds aren't completely dry, they'll mold in storage. I always double-check by gently pressing a seed between my fingers; if it feels dry and doesn't stick, it's ready. For extra protection, you can add a silica gel packet to the storage container to absorb any lingering moisture.
🌱 Step 4: Test Germination Before Planting Next Season
Before you plant the saved seeds, test a few to ensure they're still viable. Moisten a paper towel, place 10 seeds in the center, and fold it over. Seal the towel in a ziplock bag and keep it in a warm place (around 70°F). Check for sprouts in 5-7 days. If 80% or more of the seeds sprout, your batch is good to go.
If germination is low, don't panic—it might just need more time or cooler conditions. Some heirloom varieties take longer to sprout, so be patient. Once you confirm viability, you're ready to plant and grow the next generation of your favorite tomatoes. This method has saved me from losing my beloved heirlooms year after year!
Tips & tricks for saving heirloom tomato seeds
Took me years to perfect these tricks after losing batches of seeds to mold and poor germination.
Fermentation Timing: The 2-3 day fermentation window is critical—don't rush it! I've found that if you live in a cooler climate (below 70°F), you might need to extend this to 3-4 days. Watch for the mixture to develop a slightly sour smell and see bubbles forming on the surface. This indicates the seeds are properly separated from the pulp.
Drying Technique: For the 3-5 day drying period, I recommend using a seed-saving screen if you have one—it allows for better airflow than a paper towel. Place the screen in a spot with indirect sunlight or under a fan on low setting. The goal is to dry them slowly and evenly. If you notice any seeds sticking together, gently separate them with a clean toothpick.
Storage Wisdom: When storing seeds in your cool, dark place (40-50°F), I've found that adding a small packet of silica gel to the container makes all the difference. It absorbs any remaining moisture that could cause mold. Also, consider using small glass jars with tight-sealing lids—they provide better protection against humidity than paper envelopes.
Pro Tips for Save Heirloom Tomato Seeds
- Took me years to perfect these tricks after losing batches of seeds to mold and poor germination.
- Fermentation Timing: The 2-3 day fermentation window is critical—don't rush it! I've found that if you live in a cool...
- Drying Technique: For the 3-5 day drying period, I recommend using a seed-saving screen if you have one—it allows for...
Frequently asked questions
about saving heirloom tomato seeds—because even the pros had to start somewhere!How do I know when my tomatoes are fully ripe for seed saving?
Pick tomatoes that are overripe—soft, slightly squishy, and showing color changes (like blushes of pink or yellow). This ensures seeds are fully mature and viable. Avoid green or partially ripe tomatoes, as their seeds may not germinate well.
How long should I ferment the tomato seeds?
Fermentation typically takes 2–4 days, depending on temperature (warmer = faster). Stir the mixture daily to prevent mold. You’ll know it’s ready when the seeds sink and the pulp smells tangy (like vinegar). If mold appears, toss it and start fresh!
What if my seeds smell bad or mold grows during fermentation?
Don’t panic! Discard the moldy batch and try again with fresh tomato pulp. To prevent mold, use distilled water (not tap), keep containers covered loosely, and work in a warm (70–80°F) spot. A splash of non-chlorinated water or a pinch of salt can also help.
Can I save seeds from hybrid tomatoes?
Nope! Hybrid tomatoes (like ‘Early Girl’ or ‘Better Boy’) produce seeds that won’t grow true to type—they’ll be a mix of traits. Stick to heirloom or open-pollinated varieties (check seed packets). The payoff? Seeds that grow into tomatoes just like their parents!
How long do saved tomato seeds stay viable?
Properly dried and stored seeds last 2–5 years in a cool, dark place (like a sealed envelope in the fridge or freezer). For long-term storage, use airtight containers with silica gel packets. Test germination every few years—if it drops below 80%, it’s time to resave!
What if I don’t have time for fermentation?
No problem! The paper towel method is a quick alternative: Rinse seeds, spread them on a damp paper towel, and store in a sealed bag for 2–3 days. Check daily—they’re ready when they sink in water. Just note: fermentation (the saltwater method) often yields cleaner, more viable seeds.
Wrapping up and next steps
Saving heirloom tomato seeds is a rewarding way to preserve biodiversity and ensure a steady supply of your favorite varieties! By mastering the fermentation trick, you’ll unlock the secret to high-quality, viable seeds every season.
Whether you’re a seasoned gardener or just starting out, this simple process connects you to generations of gardeners who’ve cherished these heirlooms.
Now that you’re equipped with the know-how, why not try it this year? Grab a ripe tomato, follow the steps, and soon you’ll be sharing your own seed-saving success with fellow plant lovers. Happy gardening—and may your seeds grow as vibrant as your passion! 🌱✨