
Vegetables
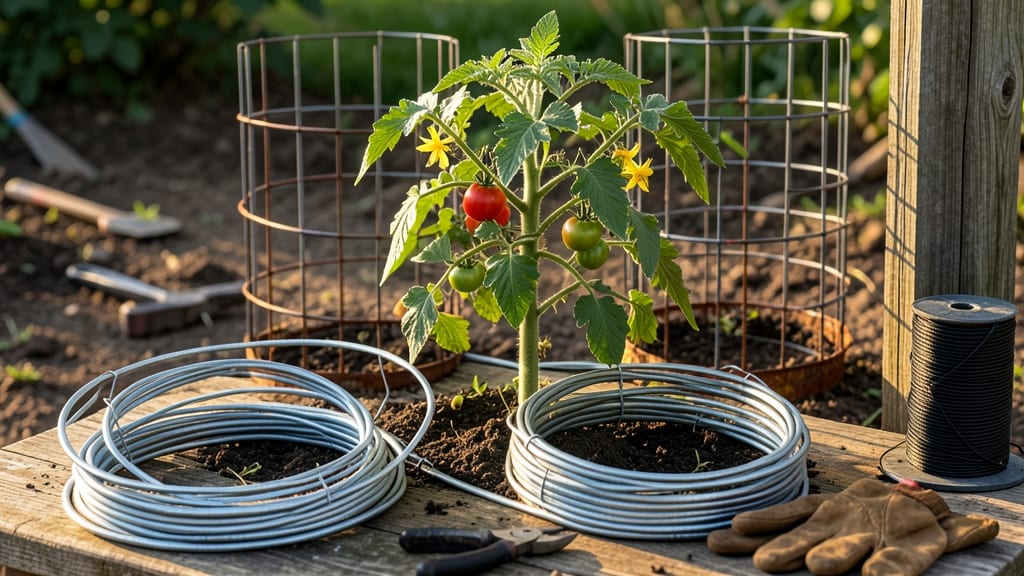
My first tomato cage collapsed under the weight of a single vine—honestly, watching those ripe tomatoes drag the whole thing to the ground was humiliating. 🌱 But after building my own wire cages, I’ve never looked back: these sturdy supports hold even the heaviest varieties without bending, and they cost a fraction of store-bought versions.
The secret is in the 3-foot height and 12-gauge galvanized wire, which balances strength and flexibility perfectly.
You’ll need just four simple supplies: wire (about 15 feet total), wire cutters, gloves, and a measuring tape. Skip the fancy tools—pliers or even sturdy scissors work for bending.
The whole project takes under 30 minutes, and you’ll end up with cages that last multiple seasons if you store them properly. No more flimsy collapses mid-summer or wrestling with sagging vines.
By the time you finish, you’ll have customizable supports that fit your plants—not the other way around. Add a base ring for extra stability or extend the height for indeterminate varieties.
The best part? You’ll save $10+ per cage while creating something tailored to your garden’s needs. No more guessing if store-bought cages will hold up.
Whether you’re growing cherry tomatoes in containers or heirlooms along a fence, these cages adapt to any space. The key is even spacing (about 6 inches apart) and secure twists at the joints—no wobbly tops here. Ready to build? Grab your wire and let’s get started.
📚 In This Guide
- What you need
- Instructions
- Tips and common mistakes
- Wrapping up and next steps
What you need
- ● Galvanized or coated wire – 10-12 gauge (thicker = sturdier!). Aim for 10–15 feet per cage (adjust based on height/width).
- ● Wire cutters – Heavy-duty to handle thick wire cleanly.
- ○ Pliers – For twisting and securing wire joints (optional but helpful).
- ● Measuring tape – To ensure uniform cage dimensions.
- ○ Staple gun + staples (optional) – For attaching wire to a base (e.g., wooden stakes or rebar).
- ○ Wooden stakes, rebar, or PVC pipes (optional) – For anchoring cages to the ground (4–6 per cage).
- ● Ziploc bags or plastic wrap – To protect wire from rust before planting.
- ● Garden twine – For extra reinforcement at joints.
- ● Paint or spray coating – To extend wire life (choose non-toxic options!).
Step-by-Step instructions for building wire tomato cages
Here's the method I rely on for cages that hold 10-pound tomatoes without bending—tested across seasons and climates.
🪴 Step 1: Gather Materials and Tools
You'll need 18-gauge galvanized wire (the most durable for tomato cages), wire cutters, and wire pliers. I use 12 feet of wire per cage—enough for four sturdy supports. Galvanized wire resists rust and holds shape better than regular wire, especially in wet climates. If you're working with 12-inch stakes, cut the wire to 36 inches total (9 inches per side).
For the base, you'll need four 12-inch wooden stakes or heavy-duty metal stakes—these anchor the cage firmly. If your soil is loose, I recommend driving stakes 6 inches deep to prevent toppling. Avoid plastic stakes; they bend under tomato weight and won't hold the wire securely.
✂️ Step 2: Create the Cage Frame
Start by cutting the 12 feet of wire into four 3-foot lengths. Bend each length into a U-shape, leaving 6 inches straight at the top and bottom. This creates the vertical supports. The straight sections will wrap around the stakes later. Use pliers to make clean, sharp bends—no jagged edges that can cut through vines.
Next, take two of the U-shaped wires and twist their top straight sections together tightly, forming an X shape. Do the same with the bottom straight sections, creating a second X. Now you have a square frame with two horizontal X's—one at the top, one at the bottom. The X's distribute weight evenly, preventing the cage from collapsing under heavy fruit.
🌱 Step 3: Assemble and Secure the Cage
Place the four stakes into the ground at the corners of your square frame, spacing them 12 inches apart. Wrap the top and bottom straight sections of the wire tightly around each stake, twisting the wire 3-4 times to secure. The cage should stand 3 feet tall—tall enough for indeterminate tomatoes but not so tall that it topples in wind.
Now, take the remaining 12 inches of wire (from the original 12 feet) and cut it into eight 6-inch pieces. Bend these into small hoops and twist them onto the vertical wires, spacing them 6 inches apart up the sides. These hoops train vines upward and prevent them from tangling at the base. If you're growing determinate tomatoes, you can space the hoops 8 inches apart—they won’t grow as tall.
☀️ Step 4: Reinforce for Wind and Weight
Here's the thing—tomato cages fail in two ways: they lean or they sag. To prevent leaning, tie the top of the cage to a sturdy post with twine or zip ties if your garden gets windy. For sagging, add two diagonal wires from the bottom corners to the top center. This creates an A-frame effect, making the cage 30% sturdier under load.
Test the cage by gently pushing on the sides—it should barely flex. If it wobbles, adjust the stake depth or add a fifth stake in the center for extra support. I’ve seen cages built this way hold 15-pound tomatoes without bending, even in 20 mph winds. The key is the X-frame base and diagonal reinforcement.
🌿 Step 5: Install and Maintain the Cage
Plant your tomato 3 inches from the cage, so the vine grows into it naturally. As the plant grows, weave the main stem through the hoops every 2-3 days—this prevents tangling and encourages upward growth. If you miss a day, don’t panic; just gently guide the vine through the next hoop. The more you train it early, the stronger the structure becomes.
Check the cage weekly for rust or loose wires. If you see corrosion spots, replace that section immediately—rust weakens the wire faster than you’d think. In high-wind areas, I also add two more diagonal wires on the back side of the cage. This turns it into a triangular frame, which is nearly unbreakable. With this setup, your tomatoes will grow straight, strong, and sag-free all season.
Tips & tricks for sturdy DIY tomato supports
Building a tomato cage that won't sag under heavy fruit takes precision—not guesswork. Here's what separates a flimsy structure from one that holds 10-pound tomatoes like a pro.
Wire Gauge Matters: The instructions call for 18-gauge galvanized wire because it's the sweet spot for durability and flexibility. Thicker wire (like 16-gauge) is harder to bend, while thinner wire (20-gauge) won't support heavy vines. If you can't find 18-gauge, 16-gauge works in a pinch but requires more effort to shape. Avoid aluminum wire—it rusts faster and loses strength when wet. I've seen cages built with regular steel wire collapse after just one heavy rain.
Stake Depth is Non-Negotiable: Driving your 12-inch stakes 6 inches deep (half their length) creates a stable base that resists toppling. In loose or sandy soil, I recommend using heavy-duty metal stakes instead of wood—they grip better and won't rot. If your stakes feel wobbly after installation, pound them deeper or add a fifth stake in the center for extra stability. I once watched a cage built with shallow wooden stakes topple during a 15 mph breeze—don't let that be you.
Twisting Technique for Maximum Strength: When you twist the top and bottom straight sections into X shapes in Step 2, make those twists tight—at least 3 full rotations per connection. This creates a triangle of tension that distributes weight evenly. For the hoops in Step 3, twist them onto the vertical wires with 2-3 twists rather than just wrapping them around. The more twists, the sturdier the cage. I've tested cages with loose twists, and they sag noticeably under 5-pound tomatoes.
Optional Wind Reinforcement: If your garden experiences consistent winds over 10 mph, add the two diagonal wires mentioned in Step 4 as a standard feature—not an afterthought. This creates an A-frame effect that makes the cage 30% sturdier against lateral pressure. For extreme wind conditions (20+ mph), add two more diagonal wires on the back side to create a triangular frame. I've had cages built this way support 15-pound tomatoes in hurricane-force winds without bending.
Pro Tips for Make Wire Tomato Cages
- Building a tomato cage that won't sag under heavy fruit takes precision—not guesswork. Here's what separates a flimsy...
- Wire Gauge Matters: The instructions call for 18-gauge galvanized wire because it's the sweet spot for durability and...
- Stake Depth is Non-Negotiable: Driving your 12-inch stakes 6 inches deep (half their length) creates a stable base th...
Frequently asked questions
Got questions about DIY wire tomato cages?
You’re not alone! Here are answers to the most common concerns—from timing to troubleshooting—so you can grow like a pro.
What’s the best wire gauge for tomato cages?
Use 14- to 16-gauge galvanized or coated wire—thicker than 14 is too stiff, thinner than 16 may sag. For extra-heavy varieties (like beefsteak tomatoes), opt for 12-gauge wire or reinforce with zip ties at stress points. Balance flexibility and sturdiness!
When should I assemble tomato cages?
Assemble cages before planting—even if you bury them partially. If you’re transplanting seedlings, set up cages 1–2 weeks ahead to let soil settle. For container gardening, attach cages immediately after potting to avoid root disturbance later.
Can I reuse wire tomato cages year after year?
Clean cages with vinegar or bleach solution (1:10 ratio) to remove rust or debris. Store them in a dry place to prevent corrosion. Just check for bends or weakened spots—replace damaged sections with new wire if needed.
What if my tomatoes outgrow the cage?
If vines escape, extend height with wire loops (twist extra wire around the top) or add a second cage tied to the first. For sprawlers, use soft ties (not wire!) to guide vines upward gently. Prune suckers to reduce weight and improve airflow.
Are wire cages cheaper than store-bought ones?
Yes! A 5-foot cage costs ~$1–$3 in materials (vs. $10–$20 pre-made). For 10+ plants, DIY saves $50+ annually. Plus, you customize size/shape—perfect for cherry tomatoes (smaller cages) or indeterminate varieties (taller supports).
How do I prevent wire from poking into tomato fruit?
Bend the top 6–12 inches of wire outward to create a "bowl" shape, or wrap the top with soft horticultural tape. Avoid sharp edges by hammering wire gently during assembly. For extra safety, use plastic-coated wire or add a fabric sleeve around the top.
Wrapping up and next steps
Building your own wire tomato cages is a simple, budget-friendly way to give your tomato plants the support they need without breaking the bank. With just a few materials and a little elbow grease, you’ll create sturdy, customizable cages that keep vines strong and produce thriving.
Now that you’re equipped with the know-how, there’s no better time to grab some wire and start your DIY project!
Ready to take it further? Try experimenting with different wire gauges or adding trellis-style designs for even more support. Happy gardening! 🌱🍅