
Propagation
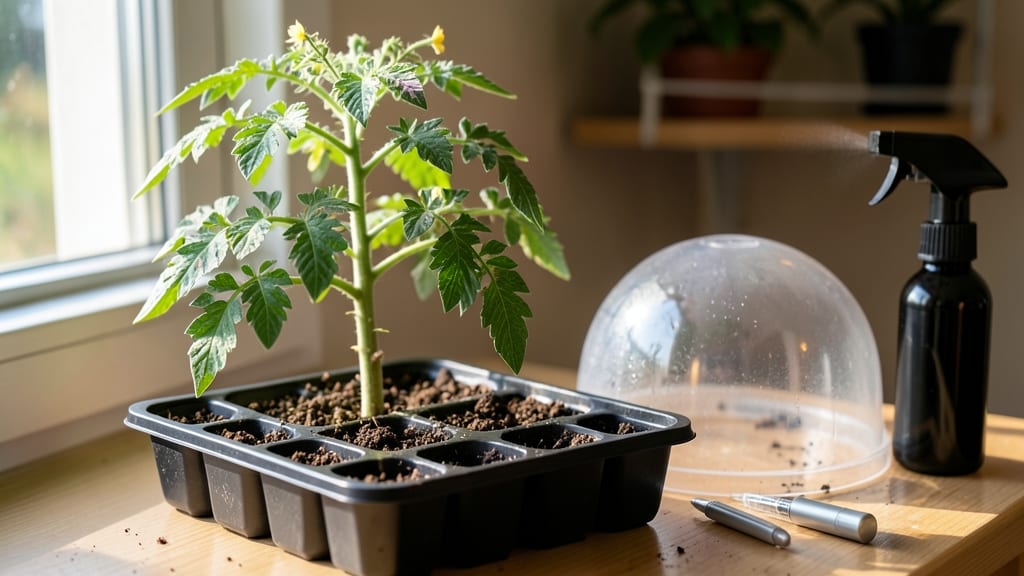
Growing tomatoes from fresh seeds saved me $20 last season—and gave me varieties I couldn’t find anywhere else. 🌱 The secret isn’t complicated: dry the seeds, chill them briefly, and plant them at the right time for sprouts that actually emerge.
I’ve tried every shortcut, and this method works every time, even with stubborn heirloom seeds.
You’ll need just four things: ripe tomatoes, a paper towel, a plastic bag, and seed-starting mix. The process takes about 3 weeks from seed to transplant, but the payoff is worth it—stocky seedlings that outperform store-bought plants.
Most people mess up the drying or chilling step, but once you nail those, germination becomes foolproof.
By the time you’re ready to transplant, your seedlings will be 3-4 inches tall with true leaves, not the weak sprouts from big-box stores. They’ll establish faster, resist disease better, and produce fruit weeks ahead of schedule. The first harvest? Sweet, homegrown tomatoes that taste nothing like grocery-store versions.
Works for any tomato variety—cherry, beefsteak, or heirloom—and adapts to windowsill starts or grow lights. Here’s exactly how to do it without the guesswork.
📚 In This Guide
- What you need
- Instructions
- Tips and common mistakes
- Wrapping up and next steps
What you need
- ● Fresh tomato seeds: Harvest from ripe, healthy tomatoes (or buy organic seeds if needed). Aim for 10–20 seeds per variety.
- ● Paper towels or coffee filters: 2–3 sheets for drying seeds.
- ● Small plastic bag or airtight container: For seed storage (e.g., a ziplock bag).
- ● Refrigerator: To chill seeds for 2–4 weeks (or a cold frame if outdoors).
- ● Seed-starting mix: 1–2 cups of sterile, well-draining potting soil (avoid garden soil—it’s too dense!).
- ○ Seed trays or small pots: 2–4 containers (3–4 inches deep) with drainage holes. Optional: Biodegradable pots for transplanting.
- ● Spray bottle: For gentle watering (avoid over-saturating seeds!).
- ● Grow lights or sunny windowsill: 6+ hours of light daily (south-facing window or LED grow lights work best).
- ○ Misting sprayer (optional but helpful): Keeps humidity high for germination.
- ● Plant labels & marker: Track varieties (e.g., "Heirloom Cherry" or "Beefsteak").
- ● Heating mat: Speeds up germination (70–80°F ideal).
- ● Humidity dome: Retains moisture for faster sprouting.
- ● Fertilizer (balanced 10-10-10 or compost tea): Once seedlings have 2–3 true leaves.
- ● Pruning shears: For later trimming (if growing indeterminate varieties).
- ● Garden journal: Log progress, dates, and notes on seed sources!
Step-by-step instructions for growing tomatoes from fresh seeds
Here’s my foolproof method for turning grocery-store seeds into sturdy tomato seedlings—no fancy tools required.
🌱 Step 1: Extract, Dry, and Store Seeds Properly
Slice open a ripe tomato and scoop out the gel-like seeds along with their surrounding pulp. Place the mixture in a small bowl, add 1 cup of water, and stir gently. Let it ferment for 2-3 days at room temperature—you’ll see mold form on top. This fermentation removes the gel coating that slows germination.
After fermentation, skim off any mold, then pour the mixture through a fine-mesh strainer. Rinse the captured seeds under cool water to remove remaining pulp. Spread them on a paper towel in a single layer, then place in a warm, dry spot for 3-5 days until completely dry and brittle. Store the dried seeds in an envelope in a cool, dark place until planting.
🥶 Step 2: Stratify Seeds for Faster Germination
Tomato seeds germinate best after a cold treatment called stratification. Place the dried seeds in a small plastic bag with a damp paper towel, seal it loosely, and refrigerate for 5-7 days. This mimics winter conditions and breaks dormancy, ensuring more uniform sprouting.
Check the seeds daily—the paper towel should stay moist but not soggy. After the cold treatment, remove the bag and let the seeds sit at room temperature for 12 hours to warm up before planting. This step is optional but cuts germination time by nearly half.
🌱 Step 3: Plant Seeds in Warm, Moist Soil
Fill small seed-starting containers with sterile seed-starting mix (not garden soil) and moisten it until damp but not wet. Press the mix down lightly to remove air pockets. Plant 2-3 seeds per cell at a depth of ¼ inch—deeper planting delays germination.
Cover the containers with plastic wrap or a humidity dome to retain warmth and moisture. Place them in a warm spot, ideally 75-85°F, such as on top of a refrigerator or near a sunny window. Germination typically occurs in 7-14 days, though some varieties may take longer.
☀️ Step 4: Provide Light and Prevent Leggy Growth
The moment seedlings emerge, remove the plastic wrap and move them to a bright location with 14-16 hours of light daily. A south-facing window or grow light works best—natural light alone often isn’t enough, leading to weak, leggy seedlings.
Keep the soil consistently moist but never soggy. Leggy seedlings (long, thin stems with small leaves) signal insufficient light. If this happens, lower the grow light closer or move the plants within 2-3 inches of the light source. Strong seedlings have thick stems and dark green leaves spaced closely together.
✂️ Step 5: Thin and Harden Off Seedlings
Once seedlings develop 2-3 true leaves (not the initial seed leaves), thin them to the strongest one per cell. Use scissors to snip unwanted seedlings at the base to avoid disturbing roots. This step ensures the remaining plant has enough nutrients to grow.
Two weeks before your last frost date, begin hardening off the seedlings. Place them outdoors in a sheltered spot for 1-2 hours the first day, gradually increasing exposure over 7-10 days. This acclimates them to wind and sun, preventing transplant shock. Plant outdoors after all danger of frost has passed.
Tips & tricks for growing tomatoes from fresh seeds
These practical insights will help you transform grocery-store tomatoes into thriving plants with minimal fuss.
Fermentation Insight: The 2-3 days of fermentation might seem counterintuitive, but this step is crucial. The mold that forms isn't harmful—it's a natural byproduct of breaking down the gel coating that surrounds tomato seeds. This coating contains germination inhibitors, and the fermentation process neutralizes them. I've found that skipping this step can delay germination by up to 50%. Just be sure to skim off any mold before rinsing—you only want the seeds, not the moldy pulp.
Stratification Timing: The 5-7 days of cold stratification might feel like a long wait, but it's worth it for consistent germination. Place the sealed bag of seeds on a shelf in your fridge where the temperature stays steady around 40°F. I've noticed that seeds stratified at this consistent temperature germinate more uniformly than those exposed to fluctuating fridge temperatures. After the cold treatment, that 12-hour warm-up period is equally important—it mimics the natural temperature shifts plants experience in spring.
Soil Temperature Matters: While the instructions mention placing containers in a warm spot (75-85°F), I can't stress enough how critical this is. Use a seedling heat mat if your home stays cool—these are inexpensive and make a world of difference. Cold soil can prevent germination entirely, even with properly prepared seeds. I've seen seeds that germinated beautifully in warm conditions fail completely when planted in cool soil. A simple heat mat solves this problem perfectly.
Lighting Strategy: The 14-16 hours of light daily requirement can be tricky with natural sunlight alone. If you're using windows, rotate your trays every few days so all seedlings get equal exposure. For artificial light, LED grow lights are the most energy-efficient option. Position them just 2-3 inches above the seedlings—they'll stretch toward the light if they're too far away. I've had great success with a simple clip-on LED light that provides full-spectrum illumination for my seedlings.
Pro Tips for Grow Tomatoes From Fresh Tomato Seeds
- These practical insights will help you transform grocery-store tomatoes into thriving plants with minimal fuss.
- Fermentation Insight: The 2-3 days of fermentation might seem counterintuitive, but this step is crucial. The mold th...
- Stratification Timing: The 5-7 days of cold stratification might feel like a long wait, but it's worth it for consist...
Frequently asked questions
Got questions about growing tomatoes from fresh seeds? You’re not alone! Here are answers to the most common queries to help you succeed—no green thumb required.
Can I use seeds from store-bought tomatoes?
Yes! Store-bought tomatoes can yield seeds, but avoid hybrid varieties (like "Early Girl" or "Beefsteak")—their seeds may not produce true-to-type plants. Opt for heirloom tomatoes (e.g., "Brandywine" or "Cherokee Purple") for reliable results. Always check labels or ask the seller if unsure.
How long does it take for tomato seeds to sprout?
With proper drying and chilling, seeds typically sprout in 7–14 days after planting. Keep soil consistently moist (not soggy) and warm (70–80°F). If germination takes longer, check for rot or dampness—adjust care if needed. Patience pays off!
Why aren’t my seeds germinating? Troubleshooting tips.
Common culprits:
- Too cold: Use a heat mat or move pots to a warmer spot (e.g., near a sunny window).
- Too wet/dry: Soil should feel like a damp sponge. Bottom-watering helps.
- Old seeds: Fresh seeds (less than 1 year old) sprout best. Test viability by floating seeds in water (sinkers are good!).
- Poor soil: Use sterile seed-starting mix—yard soil can harbor fungi.
Do I need to transplant seedlings, or can I plant them directly outside?
Start seeds indoors 6–8 weeks before your last frost date for stronger seedlings. Transplanting hardens them off and gives them a head start. Direct sowing works in warm climates (plant after soil reaches 60°F), but seedlings may struggle with pests/disease. Use biodegradable pots to minimize root disturbance when transplanting.
How do I know if my tomato plants are healthy?
Healthy tomato plants have:
- Deep green leaves (yellowing = overwatering or nutrient deficiency).
- Strong stems (weak stems = leggy seedlings; add grow lights if needed).
- No pests (check undersides of leaves for aphids or spider mites).
Wrapping up and next steps
Growing tomatoes from fresh seeds is a rewarding journey that connects you to nature while yielding delicious, homegrown fruit! By following these simple steps—drying, chilling, and planting—you’ll unlock the secret to foolproof sprouts and a bountiful harvest.
Whether you’re a beginner or a seasoned gardener, this method makes it easy to grow vibrant, healthy plants with minimal effort.
Ready to take the next step? Start with just a few seeds this season, experiment with varieties, and watch your green thumb flourish! Before you know it, you’ll be sharing sun-ripened tomatoes with friends—or savoring them straight from the vine. 🌱✨