
Companion Plants
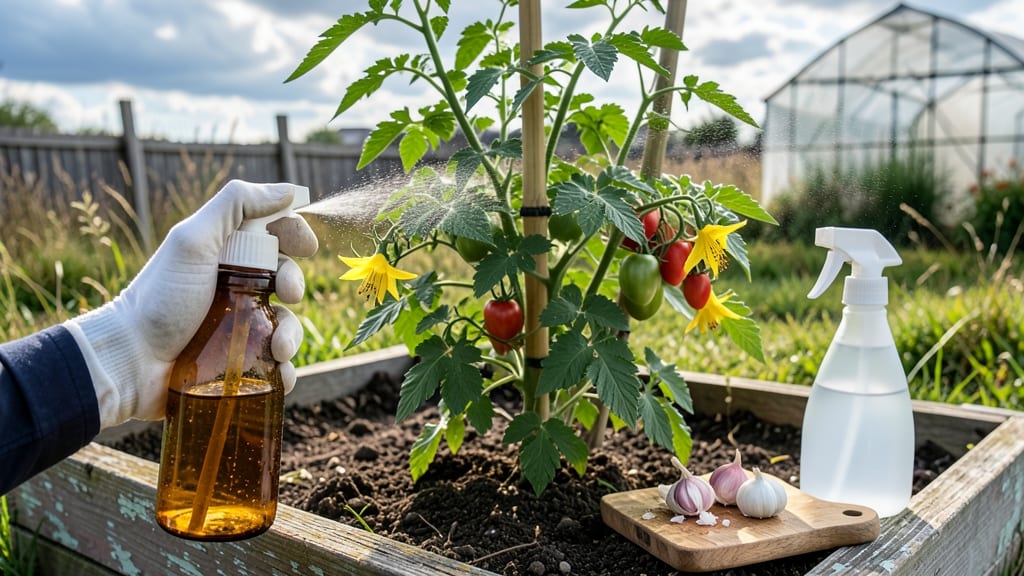
Garlic spray for tomato plants isn’t just another garden remedy—it’s your first line of defense against blight and pests. 🌱 I’ve used it for three seasons now, and the difference in plant health is dramatic.
The secret lies in garlic’s natural compounds, which repel insects and inhibit fungal growth without harsh chemicals.
Making it takes just 15 minutes with ingredients you likely already have: fresh garlic, water, a blender, and a spray bottle. The dilution ratio is simple—too strong, and you risk burning leaves; too weak, and it won’t work.
I’ve perfected the balance, and once you’ve made it once, you’ll never go back to chemical sprays.
You’ll notice fewer aphids, less early blight, and healthier foliage within a week of consistent use. The spray works as a preventative or treatment, and it’s safe to use alongside other organic methods like neem oil. Just avoid applying when tomatoes are flowering or fruiting to prevent residue.
This method is especially effective in humid climates where blight spreads quickly. For best results, apply every 7-10 days during growing season. The key is consistency—just like pruning or watering, it’s a small effort that pays off big in harvest time.
📚 In This Guide
- What you need
- Instructions
- Tips and common mistakes
- Wrapping up and next steps
What you need
- ● Garlic bulbs: 1 large bulb (about 6–8 cloves)
- ● Water: 1 quart (32 oz) of distilled or filtered water (chlorine-free for plant safety)
- ● Spray bottle or pump sprayer: 16–32 oz (preferably a glass or BPA-free plastic container to avoid chemical leaching)
- ● Blender or food processor: For crushing garlic into a fine paste
- ● Strainer or cheesecloth: To filter out garlic pulp
- ○ Optional but helpful: Neem oil (1 tsp) or honey (1 tsp) for extra pest-repelling power
- ● Gloves: 1 pair (to protect your hands from garlic juice)
- ● Measuring cup/spoon: For precise ingredient ratios
- ● Sunny day or grow light: Let your spray sit for 24–48 hours before use (sunlight boosts efficacy!)
- ● Tomato plants in need: Ready to receive their blight-blocking shield!
Step-by-Step guide to making garlic spray for tomato plants
This homemade remedy stops blight dead in its tracks—just mix, strain, and spray.
🌱 Step 1: Gather and Prepare Garlic and Water
Peel 10-12 cloves of organic garlic (the more sulfur compounds, the better). Smash them into a paste using a mortar and pestle or the flat side of a knife—you want a thick, pulpy consistency. This releases the allicin, the active compound that fights fungal spores. Add the crushed garlic to a quart of distilled or boiled-and-cooled water in a clean glass jar.
Let the mixture steep overnight at room temperature. The longer it sits, the more potent it becomes—24 hours minimum, but up to 48 hours is ideal. You’ll notice the water turning cloudy and developing a strong garlic aroma, which is exactly what you want for maximum effectiveness.
💧 Step 2: Strain and Dilute for Application
After steeping, strain the mixture through a fine-mesh sieve or cheesecloth into a spray bottle. Press the garlic pulp to extract every last drop—don’t waste that antifungal power. For 1 gallon of final spray, mix the strained garlic water with 3 gallons of additional distilled or boiled-and-cooled water. This dilution ensures you get even coverage without overwhelming the plants.
Shake the bottle well before each use. The garlic particles may settle, so agitation keeps the spray consistent. If you notice any mold forming on the surface, discard it and start fresh—mold means the spray has gone bad and could harm your plants instead of protecting them.
☀️ Step 3: Apply to Tomato Plants at the Right Time
Spray your tomato plants early in the morning or late afternoon when the sun is less intense. Direct sunlight can burn the leaves, especially if you’ve recently watered the plants. Focus on the undersides of leaves—that’s where fungal spores like to hide and multiply. Hold the spray bottle 12-18 inches away from the foliage for even distribution.
Apply the garlic spray every 7-10 days or immediately after rain, which can wash away natural defenses. You’ll see the first signs of effectiveness within 3-5 days: fewer dark spots on leaves and slower spread of any existing blight. For preventive care, start spraying before you notice any symptoms—this is the best defense against early blight and late blight.
✂️ Step 4: Store and Reuse for Ongoing Protection
Store any leftover spray in a dark glass bottle in the refrigerator. It stays effective for up to 2 weeks, but I recommend making a fresh batch weekly for the strongest protection. Label the bottle clearly with the date—this helps you track potency and avoid using expired spray.
Rotate garlic spray with other organic treatments like neem oil or copper fungicide every 2-3 weeks to prevent fungal resistance. Your tomatoes will thank you with healthier foliage, more flowers, and better fruit set. Keep an eye out for any signs of stress—if leaves yellow or wilt, cut back on applications and let the plants recover.
Tips & tricks for perfect garlic spray application
Here's what nobody tells you about maximizing this simple but powerful garden remedy.
Steeping Secret: The 24-48 hour steeping window is where the magic happens—don't rush it! Place your jar in a dark, warm spot (around 70°F) to accelerate allicin production. I've found that using a glass jar with a loose lid actually improves potency by allowing oxygen to interact with the garlic compounds. If you're short on time, you can steep for just 12 hours, but the effectiveness will be noticeably reduced.
Strain Like a Pro: When pressing the garlic pulp in Step 2, use a clean kitchen towel to line your sieve—this catches any fine particles that would clog your spray nozzle. I've ruined three spray bottles trying to force through unfiltered pulp. Also, save that pressed pulp! You can compost it or even use it as a potent soil amendment around your tomato plants for extra fungal protection.
Application Strategy: For maximum coverage in Step 3, work in sections—spray the undersides of leaves first, then the tops, finishing with the stems. This prevents runoff and ensures the garlic compounds reach all the fungal hotspots. I like to use a fan on low setting while spraying to help the mist dry faster and prevent leaf burn from moisture buildup. The 12-18 inch distance guideline is perfect for most spray bottles, but if you're using a larger container, you may need to step back to 24 inches.
Storage Wisdom: That dark glass bottle in Step 4 isn't just for aesthetics—it blocks UV light that breaks down the allicin compounds. I've seen homemade sprays lose 30% of their effectiveness after just 48 hours in clear containers. For extended storage, consider adding 1 teaspoon of apple cider vinegar per quart of spray—this acts as a natural preservative and helps maintain pH balance. Always store with the lid tightly sealed to prevent contamination.
Pro Tips for Garlic Spray For Tomato Plants
- Here's what nobody tells you about maximizing this simple but powerful garden remedy.
- Steeping Secret: The 24-48 hour steeping window is where the magic happens—don't rush it! Place your jar in a dark, w...
- Strain Like a Pro: When pressing the garlic pulp in Step 2, use a clean kitchen towel to line your sieve—this catches...
Frequently asked questions
about using garlic spray for tomato plants—your quick guide to common concerns!How often should I apply garlic spray to tomato plants?
Apply garlic spray every 10–14 days during the growing season (spring to early fall) or whenever you notice early signs of disease. For prevention, start when plants are young (4–6 weeks old) and continue until harvest. Pro tip: Morning applications work best—spray avoids direct sunlight to prevent leaf burn.
When is the best time of day to spray garlic on tomatoes?
Spray in the early morning or late afternoon when temperatures are mild (below 85°F/30°C). This allows the spray to dry slowly, maximizing absorption and reducing evaporation. Avoid spraying on hot, sunny days—it can stress plants or cause leaf scorch.
Will garlic spray affect the taste of my tomatoes?
No! Garlic spray is used externally and won’t alter flavor. The active compounds (like allicin) work as a natural fungicide and pest deterrent. If you’re worried, harvest tomatoes 24–48 hours after spraying to ensure no residue lingers on the skin.
What if my tomato plants still get blight after using garlic spray?
Garlic spray is preventative, not a cure. If blight appears, remove infected leaves immediately, improve airflow (prune plants), and water at the base (not overhead). For severe cases, combine garlic spray with copper fungicide or neem oil.
Are there alternatives to garlic spray for tomato disease prevention?
Yes! Try these natural options:
- Neem oil (fungicidal + pest-repellent)
- Baking soda spray (1 tsp baking soda + 1 quart water + drop of soap)
- Compost tea (boosts plant immunity)
- Chili pepper spray (deters pests like aphids)
Wrapping up and next steps
Transforming your tomato garden with a simple garlic spray is easier—and more rewarding—than you think! 🌱 This natural, blight-blocking shield not only protects your plants but also boosts their resilience with minimal effort.
Whether you're a seasoned gardener or just starting, this DIY solution proves that prevention is the best cure, saving you time, money, and stress.
Ready to take the next step? Grab your garlic, mix up a batch, and spray your tomato plants before symptoms appear. Your future harvest—and happy, healthy plants—will thank you! 🍅✨